Insert a graphic note as follows:
| 1. | Choose the ribbon command Insert | group Annotations | Note  . . |
| 2. | In the menu that appears, select one of the tools for notes      and place the graphic note in the document using the left mouse button. and place the graphic note in the document using the left mouse button. |
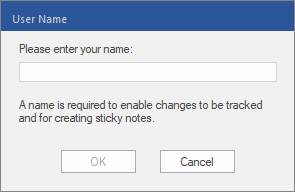
| Note: If, under File | Options, you have not yet entered a user name on the Saving tab, FlexiPDF now prompts you to do so: |
| This user name is mentioned in each new comment that you insert. |
| 3. | The different drawing shapes for graphic notes can be placed in the document as follows: |
|
Drag out a box depicting the final size of the shape. Hold down the Shift key as you drag in order to draw a square or a circle.
|
|
Click on the page and drag the first line. Clicking again will result in the next line segment, which is connected to the previous one. Double-click to complete the polygon.
|
|
Hold down the left mouse button and draw a freehand shape on the page as if you were using a pencil.
|
|
Click on the page and drag out a straight line. While dragging, hold down the Shift key to align the line in 45-degree increments.
|
| 4. | Double-click on the shape you created in order to enter your comment text in the note window. |
| Alternatively: Right-click on the shape for the context menu, and select Open Note. |
| 5. | To exit note mode, press Esc on the keyboard or select another tool in the Quick access toolbar. |