On the ribbon tab Home | group Character, you will find the commands that are used to Underline and Strikethrough text.
Proceed as follows:
| 1. | Use the Text edit tool |
| Alternatively, use the Object tool |
| 2. | Click on the Underline |
| 3. | For more control over the thickness, color and position of the underline or strikethrough, there are other options: |
| After you have applied an underline or strikethrough as described above, click on the small arrow of the Underline or Strikethrough button, and select More in the menu that appears. |
| This will open the dialog box Underline Options or Strikethrough Options. For more information, see below. |
Underline and strikethrough options
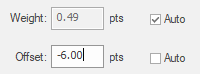
You can use the dialog box to change the thickness, position and color of the line. To do so, remove the check mark in front of "Auto".
Examples of effects:
Offset -6 points |
|
|
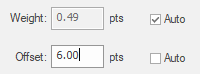
Offset +6 points |
|
|
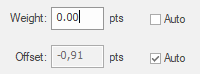
Weight 0 pt (hairline) |
|
|
Text with background |
|
|


Color
By default, the respective text colors are used for underlines and strikethroughs. To apply a different color, remove the check mark for Same as text. You can now click on the Color button to select a new color in the dialog box "Color Picker".
In this dialog box, set the desired Fill color. For more information, see Color.
Notes
▪Underline: The underline is located at the level behind the text.
▪Strikethrough: The strikethrough is located at the level in front of the text.