The command Home | Go to ![]() (in the Search group) is used to set the cell frame to a specific cell in the table.
(in the Search group) is used to set the cell frame to a specific cell in the table.
A dialog box appears where you can type in the desired cell address. Both a single cell address (for example D2) and a cell range (for example D2:D4) are permitted.
In the list below the input field, all areas of the table named with the ribbon command Formula | Named area | Edit names are also listed so that these can also be accessed immediately.
Confirm with OK to jump to the specified cell(s).
Tip: A faster method
There is also a faster method: In the edit toolbar (above the table window) there is an expandable list on the left, which normally shows in which cell the cell frame is currently located.
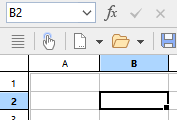
Here you can enter the address of a cell or cell range – just like in the dialog box from the Home | Go to command. When you press the Enter key↵, PlanMaker highlights the corresponding cell(s).
And: Clicking on the small arrow right of the control opens a dropdown list of all named ranges. Clicking on one of these names will highlight the corresponding cell range.