If desired, you can add headers and/or footers to a worksheet. Headers/footers are repeated on the top/bottom of each printed page of a worksheet. You can also insert useful fields here, such as page number, file name, print date, etc.
Note: Each worksheet of a document can have its own headers/footers.
To edit the header of the current worksheet, for example, proceed as follows:
| 1. | On the ribbon tab Layout | group Page setup, choose the command Header and footer. |
| Alternatively, you will find the command on the ribbon tab Insert | group Text. |
| PlanMaker opens the following dialog box: |
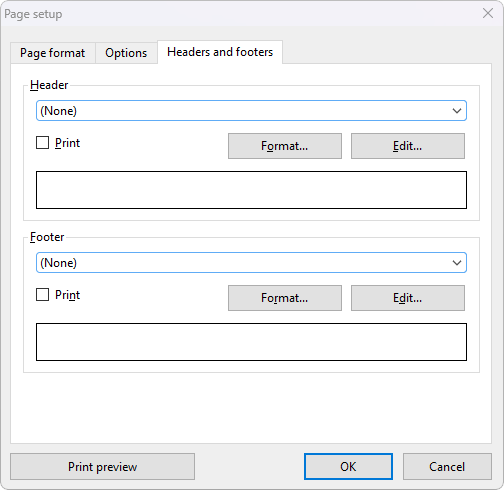 |
| 2. | To apply one of the predefined headers, select it from the dropdown list box at the top of the dialog box. |
| To customize the header to your liking, click on the Edit button (see "Editing headers and footers" below). |
| To change the format of the header, click on the Format button (see "Formatting headers and footers" below). |
| 3. | Confirm with OK. |
The header has now been changed accordingly.
Editing footers can be performed in the same manner as headers (using the dialog controls at the bottom of the dialog box).
Tip: Headers/footers are not displayed in the worksheet on the screen – they appear in the printout only. However, you can view the appearance of the header and footer with the Preview button or also at any time with the ribbon command File | group Print | Print Preview.
Editing headers and footers
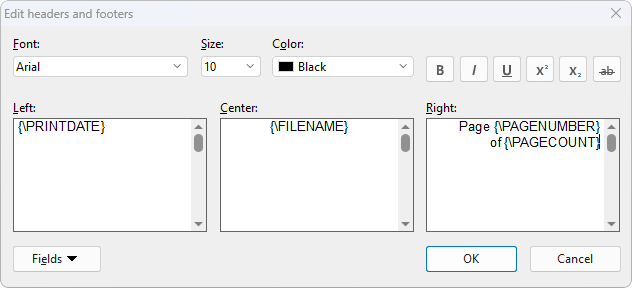
When you click on the Edit button in the aforementioned dialog box, you can edit the worksheet's headers and footers as desired.
Some notes:
▪Headers/footers can contain up to three sections
| The input fields in this dialog box are split into three parts. This is due to the fact that headers/footers can consist of up to three sections: a left section (left-aligned), a middle section (centered) and a right section (right-aligned). This allows you to display, for example, the date on the left, the file name in the middle and the page number in the right section of the header/footer. |
| Of course, you can also fill in only one of the three sections, for example, if you only want to have the file name displayed on the left. |
▪Using fields for page numbers, file name, etc.
| To insert fields into headers/footers, click on the Fields button. |
| Fields are wildcards that symbolize a specific piece of information. If, for example, you insert a field for the page number, the wildcard {\PAGE NUMBER} is in the input field. When printing, this symbolic information is then automatically replaced by the page number. |
| The following fields are available: |
Field name |
Output |
Document name |
File name of the document (for example, "My Table.pmdx") |
Document path |
File path of the document (for example, "C:\Tables") |
Document name and path |
File name and path of the document (for example, "C:\Tables\My Table.pmdx") |
Worksheet name |
Name of the current worksheet |
Page number |
Page number |
Number of pages |
Total number of pages |
Print date |
Current date (date of printing) |
Print time |
Current time (time of printing) |
Date last changed |
Date the document was last changed (and saved) |
Creation date |
Date the document was created |
| To insert one of these fields, click on the Fields button and then click on the desired field. |
▪Changing the character format
| To change the character format (font, font size, etc.) of text in the header/footer, use the controls located at the top of the dialog box. |
| Note: First, select the text to be formatted (in one of the three input fields). |
Formatting headers and footers
In addition to changing the character format of headers/footers (see above) you can also apply borders and shades or change the alignment and margins. To do so, click on the Format button in the main dialog box of the ribbon command Layout | Header and footer.
The program displays another dialog box containing the following tabs:
▪Shading tab
| Here, you can add a colored shade or a pattern to the headers/footers. The controls in this dialog box are identical to those described in Shading. |
▪Borders tab
| Here, you can add a border or individual border lines to the headers/footers. The controls in this dialog box are identical to those described in Borders. |
▪Alignment tab
| Here, you can change the inner margins and the vertical alignment of the headers/footers. |
Tip: The distance between headers/footers and the top/bottom edge of the page cannot be changed here, as they must be changed in the main dialog box "Page setup" on the Page format tab.
Disabling headers/footers temporarily
If you want to print a document occasionally without its headers or footers, choose the command Layout | Header and footer and disable the option Print in the dialog box. The headers or footers will then be retained but will no longer appear in printouts.
If you want the headers/footers to be printed again, simply enable the option Print again.