The command Home | Go to ![]() (in the group Search) is used to set the cell frame to a specific cell in the table.
(in the group Search) is used to set the cell frame to a specific cell in the table.
The program displays a dialog box in which you can enter the desired cell address. Both an individual cell address (for example, D2) and a cell range (for example, D2:D4) are permitted.
In the list below the input field, all areas of the table named with the ribbon command Formula | Named area | Edit names are still listed so that they can also be accessed immediately.
If you confirm with OK, PlanMaker will immediately select the corresponding cell or cell range.
Tip: A faster method
There is also a faster method: In the Edit toolbar (above the table window), there is a dropdown list on the left, which usually shows in which cell the cell frame is currently located.
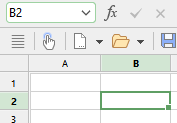
Here, you can enter the address of a cell or cell range – just like in the dialog box of the command Home | Go to. When you press the Enter key↵, PlanMaker highlights the corresponding cell(s).
In addition: If you click on the small arrow to the right of the list, it will open and display all named ranges for selection. If you click on a name, the corresponding cell range will be immediately selected.