FreeOffice: The functions for inserting tri-fold/bi-fold marks are not included in SoftMaker FreeOffice.
You can now also insert fold marks into your document to fold the printout of the letter in the right places by means of two small lines in the page margin.
On the ribbon tab Layout | group Page setup, click on the group arrow![]() in the bottom right corner and switch to the Fold marks tab in the following dialog box:
in the bottom right corner and switch to the Fold marks tab in the following dialog box:
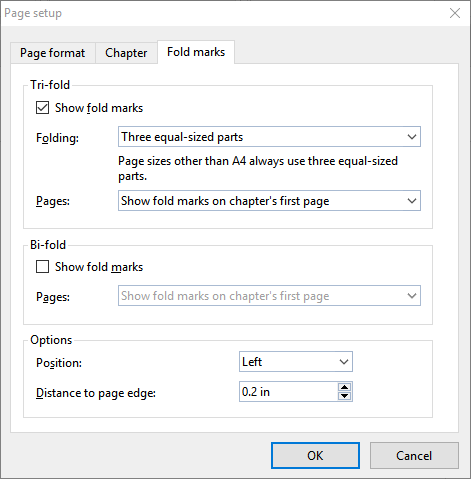
In the Tri-fold section, enable the option Show fold marks. This makes two marks in the document for subsequent folding (one upper and one lower mark).
In the list below, select the option Three equal-sized parts. Explanation for the other two options DIN type A and DIN type B: These options are mainly of interest to users who adhere to the DIN standards that are common, for example, in Germany.
In the Pages list, the option Show fold marks on chapter's first page is already preset appropriately. Explanation: The fold marks are thus only displayed on the first page of the document. Other settings (e.g. fold marks on all pages) are, of course, also possible here.
Then confirm the insertion of the fold marks with OK.
Tip: You can also insert a central bi-fold mark as a mark that can be used as a punching orientation when stapling documents. To do so, enable the option Show fold marks in the Bi-fold section further below in the dialog box.
For more information about fold marks and bi-fold marks, see Fold marks.