Before going any further, you can open the Tour2.tmdx document and compare it with your results thus far. It contains the current state of our sample document.
Many business letters include a line with information such as "Your reference", "Your letter of", etc. We want to insert such a line now and become familiar with the use of tabs in the process.
Note: You insert tabs by pressing the Tab key. Although this key is labeled with two arrows F on most keyboards, the label Tab is used in this manual in order to distinguish it more clearly from the direction keys.
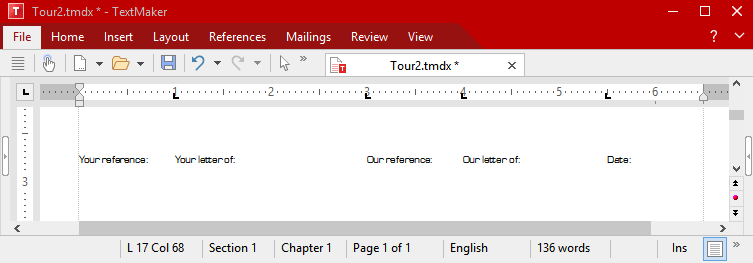
Now move the text cursor to the beginning of the 17th line and type the following line:
Your reference:[Tab]Your letter from:[Tab]Our reference:[Tab]Our letter from:[Tab]Date: |
Then format this line in the MicroSquare font, 8 point.
You have now inserted tabs into the text, but you have not yet determined their exact positions. To do so, set tab stops. By default, TextMaker automatically puts a tab stop every 0.5 inch – but you generally should not adopt this default setting which stems from the era of typewriters.
Tab stops can be set via the dialog box of the ribbon command Layout | Tabs ![]() (see below) – or directly via the horizontal rulerdisplayed above the document.
(see below) – or directly via the horizontal rulerdisplayed above the document.
![]()
The horizontal ruler
If the ruler is not visible, you must first enable it on the ribbon tab View | Horiz. ruler ![]() .
.
You use the ruler to set tab stops as follows:
| 1. | Select the paragraph in which the tab stops are to be set. |
| If you want to set up the tab stops for multiple paragraphs, you must first select these paragraphs as previously described. |
| With respect to our example, please now select the line you just entered and the line below it because we want the subsequent tab stops for the next line to be set in the same manner. |
| 2. | Choose the desired tab type. |
| To do so, click on the icon to the left of the horizontal ruler. Each time you click on the icon, the tab type changes. The following types are available: |
|
Left-aligned tab |
|
Centered tab (the text is centered at the tab position) |
|
Right-aligned tab (the text ends at the tab position) |
|
Decimal tab (numbers are aligned to the decimal point) |
| Click on this icon now until Left tabs are chosen. |
| 3. | Click on the desired tab positions in the ruler. |
| Use the mouse to click on the ruler at the (approximate) positions of 1 inch, 3 inches, 4 inches and 5.5 inches in order to set tab stops at those positions. Note how the text is aligned accordingly. |
By the way, you could have proceeded in the opposite manner: You could have defined the tab stops before you typed the line "Your reference", etc., and then typed the text along with the tabs.
The ruler and text should now look something like this:
The tab stops are now set and are displayed in the ruler.
If you don't like the position of a tab stop, you can move it directly in the ruler. If necessary, select the paragraphs to be changed; then point at the tab stop with your mouse held down and drag it to a new position in the ruler. Note: If you drag a tab stop downward out of the ruler, it will be deleted.
There is yet another way to proceed when setting tab stops.
Leave the two paragraphs selected and click on the Tabs icon ![]() on the ribbon tab Layout | group Paragraph. A dialog box opens and shows you the exact positions of the tab stops that are currently set. This dialog box is handled as follows:
on the ribbon tab Layout | group Paragraph. A dialog box opens and shows you the exact positions of the tab stops that are currently set. This dialog box is handled as follows:
Action |
Procedure |
Set new tab stops |
Enter the desired position in the field Tab. Click on Set. |
Delete tab stops |
Select one of the existing tab stops in the list and click on Clear. To remove all tab stops at once, click on Clear all. |
Shift tab stops |
Delete the tab stop and set a new one. |
Change the alignment |
Click on one of the existing tab stops in the list, choose a new alignment with Alignment and click on Set. |
Let's go back now to our sample letter:
Now that the tab stops for the line "Your reference", etc., and the line under it have been set, we want to enter something in the second line.
Move the text cursor to the beginning of this line (L 18) and type, for example, the following:
MB[Tab]5/14/21[Tab]HG[Tab]5/10/21 |
Since this line was selected along with the line above it when the tab stops were set, you see that the same tab stops are used here also.
What is still missing, of course, is today's date. We will let TextMaker insert it automatically in the next section and thus enable you to become familiar with a very practical feature of TextMaker, namely the fields.