Sometimes, the text in a box has to flow around another shape (for example, a picture or a chart). For this purpose, you can adjust the right or left margin of each paragraph of a text box. For more information, see Margins and indents.
It's faster if you just adjust the width of the affected lines:
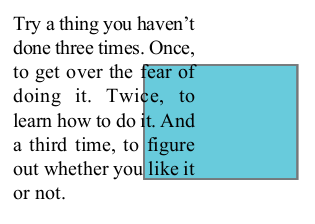
Manually adjusting the line width
| 1. | The text below should wrap around the turquoise rectangle. |
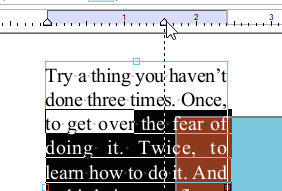
| 2. | Use the Text edit tool  in the Quick access toolbar, and select the lines that have to be moved. in the Quick access toolbar, and select the lines that have to be moved. |
| 3. | At the top right, the additional ribbon tab Format will be displayed with the heading Text box. |
| Choose Format | group Inner text | Line width  | Apply manual text flow. | Apply manual text flow. |
| 4. | A border will be drawn around the affected lines, and the ruler will be highlighted in blue. |
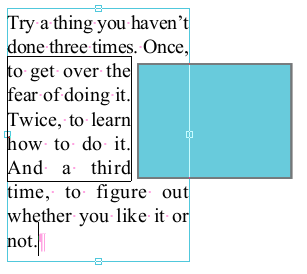
| 5. | Select single or multiple lines again and drag the right-margin marker on the ruler to the left until the text no longer touches the turquoise rectangle. |
| 6. | The text box will be reflowed, and the adjusted lines will remain shorter than the other lines. They will no longer cover the turquoise rectangle. |
Note
▪If you want to reset the manual adjustment of the line width to the normal line width, select the affected lines and choose the command Format | group Inner text | Line width | Use normal text flow. This will take you back to the original ("automatic") line adjustment, as it was applied by default before the manual adjustment.
▪The fact that a line is in manual adjustment mode is not recorded when you save the PDF. If you reopen the file and edit the text that was previously reflowed in this manner, it will revert back to the original paragraph margins. In our example, it will then protrude again into the turquoise rectangle.