In the previous sections, we created three simple slides and filled them with content. We are now going to jazz up the presentation a bit by applying visual effects. Let's start with slide transitions.
Slide transitions are effects that appear when you switch from one slide to the next while presenting a slide show. Presentations offers a number of different transition effects to help you create engaging presentations.
Slide transitions can be applied either to individual slides or to all slides in a presentation at once. In our example, we will apply a transition effect to the entire presentation.
Proceed as follows:
| 1. | On the ribbon tab Transition, click on the group arrow |
Tip: You can also use the buttons on the ribbon tab Transition or in the sidebar to apply all slide transition commands directly. For demonstration purposes only, we selected the route via the dialog box for the sake of compact clarity.
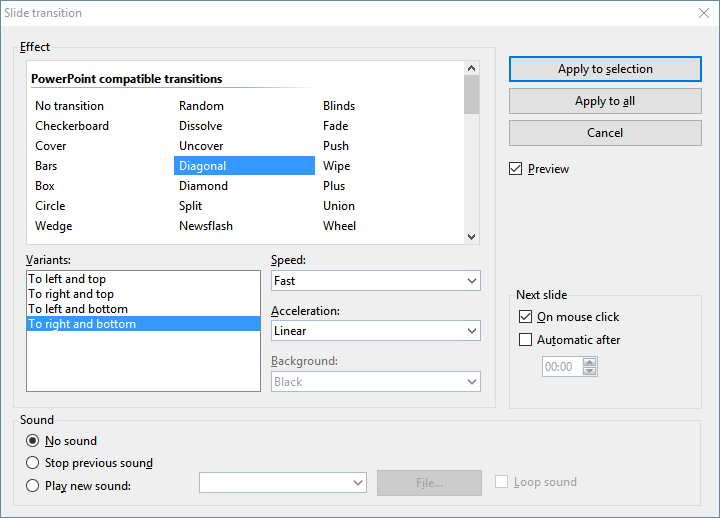 |
| 2. | Select, for example, the Diagonal effect and To right and bottom variant. |
| 3. | If desired, you can also change the Speed. You can preview any change to the effect directly in the document window (if the Preview option is enabled). |
| 4. | Confirm with Apply to all. |
The slide transition has now been applied to all slides in the presentation.
Tip: In the mini sorter, which is displayed to the left of the slide, a small icon ![]() now appears in the top left corner of each slide. It indicates that the corresponding slide uses a slide transition. When you click on this icon, a preview of the transition effect is displayed in the thumbnails.
now appears in the top left corner of each slide. It indicates that the corresponding slide uses a slide transition. When you click on this icon, a preview of the transition effect is displayed in the thumbnails.
For more information on slide transitions, see Using slide transitions.