To complete the presentation, we'll add a third slide detailing the proposed project timeline as a table. To do so, we choose the ribbon command Insert | Slide to create a new slide for which we select the layout with a title placeholder and a single large content placeholder. It is called "Title and content".
Choose it and confirm it.
In the new slide, first enter "Proposed Timeline" in the title placeholder at the top.
Let's insert a table into the slide as the next step. It should contain five rows and two columns. To do so, proceed as follows:
| 1. | Click on the table icon |
| 2. | Set the number of rows to "5" and columns to "2". |
| 3. | Confirm with OK. |
The placeholder is now replaced by the desired table.
Note: An additional ribbon tab is also displayed on the far right as a tab: the contextual ribbon tab Table. This always appears automatically when you place the text cursor in the table and contains options for editing the table.
Now enter the following date information in the left column and the corresponding action in the right column. You can jump from one table cell to the next using the Tab key:
01/2018 – 07/2018 |
Planning and Preparation |
07/2018 |
Groundbreaking Ceremony |
07/2018 – 07/2019 |
Construction |
07/2019 – 12/2019 |
Inspection and Acceptance |
01/2020 |
Grand Opening |
Finally, let's change the column width and align the text in a nicer manner:
Changing the column width
Since some of the texts in the right column do not fit in one row, we should widen the column. To do so, move the mouse cursor over the vertical line between the two table columns. When the cursor becomes a double arrow, click on it and hold down the left mouse button in order to drag the vertical line a little to the left.
Aligning text
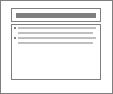
The text in our table looks like it was "sticking" to the top edges of the cells. It might be a good idea to finally center the text entries vertically.
The table is already selected as a result of the previous action. If not, select the table again
(for example, by choosing the command Select ![]() on the contextual ribbon tab Table).
on the contextual ribbon tab Table).
Then proceed as follows:
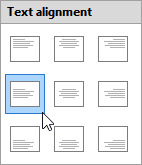
| 1. | Choose the command Text alignment |
| 2. | In the following menu, click on the Align center to left button: |
 |
Changing the font size
If the font seems too small, select the cells and change the font size, for example, from 18 to 28, on the ribbon tab Home | group Character.
For more information on font size, see Font and font size.
Your final slide should now look similar to this:
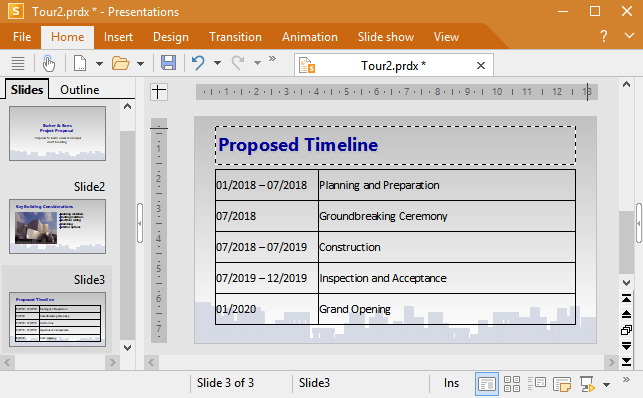
The third slide with a table for the timeline
For more information on working with tables, see Tables.