Lists in which each item is presented in its own paragraph preceded by a marker are particularly clear and are often used in presentations. Such markers are called bullets and lists with bullets are called bulleted lists.
In our presentation example, such a bullet listed is very suitable for listing the most important points that must be taken into account in our new building. To type them, click in the placeholder on the right (but not on the icons in the center). The info text and icons disappear and you can enter text.
The placeholder is already preformatted for bulleted lists. Simply enter the bullets in the placeholder. As soon as you start typing, you will see that there is already a bullet in front of the text. To start the next bullet point, press the Enter key↵ and type the second point. Enter the following list in this manner in your presentation:
▪Building materials
▪Roofing materials
▪Electrical wiring
▪Plumbing
▪Interior fittings
After entering the list, you can change its formatting.
Formatting the bulleted list
We'd now like to make the list entries a little more eye-catching in our presentation example. For this purpose, we will make the font bold and change the bullets.
To change all list entries, first select the entire list by clicking on any list entry and then choose the ribbon command Home | group Selection | Select all. Alternatively, use the keyboard command Ctrl+A.
Then click on the Bold icon ![]() on the ribbon tab Home | group Character to make the text bold.
on the ribbon tab Home | group Character to make the text bold.
Finally, let's change the bullets a little:
| 1. | To do so, select the entire list again as described above. |
| 2. | On the ribbon tab Home | group Paragraph, select the bullets icon |
| 3. | In the menu that is then displayed, you can choose from different groups of bullet types. |
| Note: You can use the entry Format bullets to customize the bullets. For more information, see Bulleted lists. |
For our presentation, we select the filled diamond from the Default bullets.
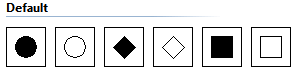
The filled diamond option is the third bullet from the left
The second slide in your presentation should now look as follows:
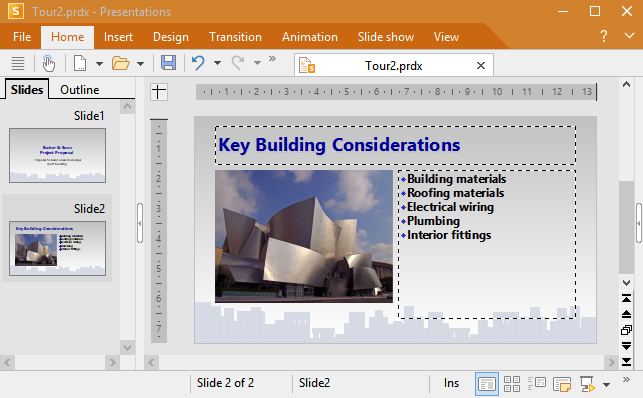
The second slide with a bulleted list of the tasks