To change the formatting, position or size of headers and footers for slides at a higher level, you must first switch to the respective master view. This can be done with one of the following commands on the ribbon tab View | group Master:
▪For normal slides: ribbon command Slide master ![]()
| (Then select the slide layout that you want to modify in the mini sorter. Note: Changes made to the top layout in the list affect all other layouts.) |
▪For handouts: ribbon command Handout master ![]()
▪For notes: ribbon command Notes master ![]()
In these views, the areas designated for headers and footers are displayed at the top (headers) and bottom (footers). In the slide master, for example, the footer consists of the Date area, the Footer area and the Page number area:
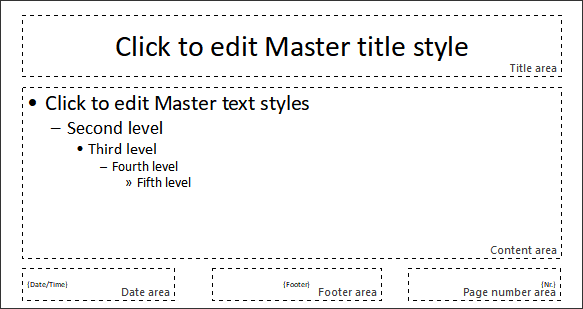
Master view for the slide master (Note: Header areas are only available in the notes and handout master.)
To create headers and footers and to edit their content, choose the ribbon command Insert | group Text | Header / footer as in the normal slide view. (Typing content directly into the areas of the master view does not produce any results.)
In addition, the content of these areas can be subsequently edited individually in the slide view for each slide by clicking into a created area and typing in your changes.
If you select an area in the master view (for example, by clicking on its border), you can make the following changes:
▪To change the formatting of the content, use the usual commands of the command groups Character and Paragraph on the ribbon tab Home.
▪To move an area, use your mouse to drag it to the desired position.
▪To change its size, drag one of the handles surrounding its borders.
▪In the command group Objects on the ribbon tab Home, you can edit the object properties (fill color, line color, etc.) of an area.
▪On the contextual ribbon tab Object (which appears as soon as you select a header or footer), you will find additional options for the general object properties that correspond to those of text frames. For more information, see Changing text frame properties via the ribbon tab.
Note: In the Slide master, you can also make these changes specifically for a certain slide layout; the changes will then affect all slides with the corresponding layout. Exception: The contents of the footer (using the command Insert | group Text | Header / footer to enter it in the dialog box!) are always applied to all slides.
For more information on the master view, see Working with masters.