In the Android/iOS version, the command is locked. (To unlock the command, see Welcome.)
The print preview displays a document on the screen exactly as it will look in the printout. This feature enables you to avoid wasting paper on test prints.
To start the print preview, choose the ribbon command File | Print preview ![]() .
.
To exit it again, click on the Close button ![]() in the preview module (see below) or press the Esc key.
in the preview module (see below) or press the Esc key.
Using the preview module

The print preview module has the following functions (from left to right):
▪Print corresponds to the ribbon command File | Print, which you can use to print the document. For more information, see also Printing a document.
▪Print merge corresponds to the ribbon command File | Print merge with which you can output a document as a mail merge after assigning records. For more information, see also Mail merge.
▪PDF export corresponds to the ribbon command File | PDF export with which you can create a PDF file from the document. For more information, see also Exporting a document to a PDF file.
▪Page margins are found in the ribbon command Layout | Page margins, which you can use to open a dropdown list of predefined values for the page margins.
▪Page orientation is found in the ribbon command Layout | Page orientation, which lets you choose between portrait and landscape orientation.
▪Page size is found in the ribbon command Layout | Page size, which you can use to open a dropdown list of predefined values for the paper size.
| Note: Click on the group arrow |
▪The buttons of the command group Pages are used to scroll through the document:
|
To the first page |
|
To the previous page |
|
Go to a specific page number. To do so, type the page number in the small input field in the middle and then press the Enter key↵. |
|
To the next page |
|
To the last page |
▪You can set the zoom level in the command group Zoom. Enter the desired percentage value in the lower input field and press the Enter key↵. If you click on the small arrow next to it, you can select predefined zoom levels from a list.
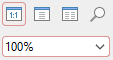 |
| Alternatively, you can use the buttons above it to set the following zoom levels: |
|
Actual size of document (zoom level 100%) |
|
Display one full page |
|
Display two full pages side by side |
|
Enable magnifying glass: Then use the mouse to drag a rectangle around the area you want to magnify. |
▪Print comments: The comments are also output in the printout.
▪Print changes: Highlighting for all changes to the document that were recorded with the "Track changes" function are also output in the printout. For more information, see Reviewing documents)
▪Print pictures: The pictures are also output in the printout (enabled by default).
▪Record: This option only appears for Mail merges: Select the record that you want to print.
▪Standard: This command switches the document view to the standard view. This is the view that you normally use when working with TextMaker.
▪Book layout: This command switches the document view to the book layout view. You get a two-page view with the odd pages displayed on the right instead of on the left, as they would be in an open book.
To exit the print preview, click on Close ![]() or press the Esc key.
or press the Esc key.